Content
Timesheet
Procedure
- Select date: When you first enter the page, todays date will be selected. If you want to edit the timesheet for another date, use the "Select date" button (only shown as a calendar icon on mobile)
- Choose start time and break: In the main form, select the time you started working, and the total length of breaks you have taken during the day. You can not edit the end time. This is automatically updated when you add work activities.
- Register work activities: Below the main form, you can add your work activities for the day. Click "Add activity..." to open a form where you select category and number of hours worked.
- Submit timesheet for approval: When the timesheet for the selected date is complete, click "Submit" (paperplane icon on mobile) in the top right toolbar.
NB! There is a restricted date span where editing the timesheet is allowed. The timesheet also can't be edited after you have submitted it for approval. If you still need to do changes for locked dates, please contact your supervisor, or the payroll department.
Select date
To open a calendar where you can choose which date to input timesheet data, click "Select date" (calendar icon on mobile), or click the date already selected.
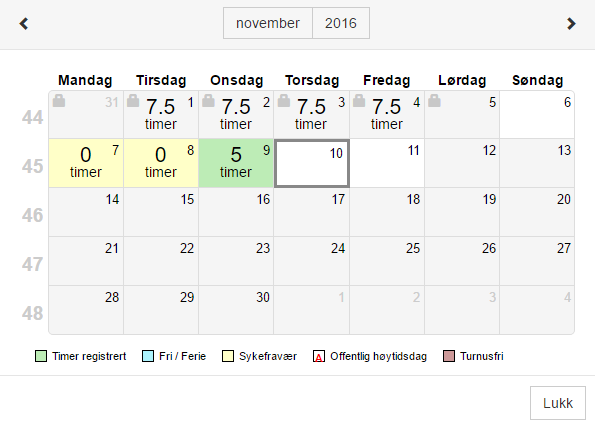
Days for which you have registered your timesheet will be marked with a green background, and the number of hours registered in the middle. Click on a date to open it. Dates where it is no longer possible to input timesheet data will have a grey background, and a small lock symbol in the top left corner. You can still open the date to review the data.
Day form
In this form, select the date you wish to register hours for, the time you started working and enter the total duration of your breaks.
Fields in the form may vary based on your work place and position.
This should only be done one time per day, and applies to all the activities in the list below. E.g. you don't need to enter the starting time for all the projects, only the time you started working that day.
Changes done in this form will be saved automatically when you add, delete or edit activities below the form. Always verify that the time fields match your work day.
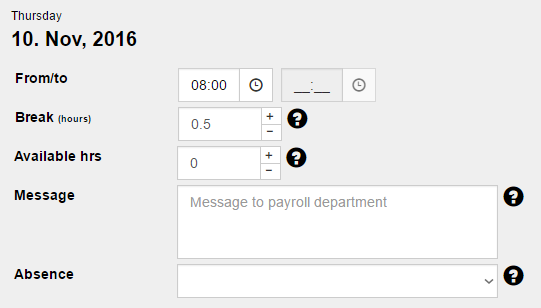
Description of the form fields
Available fields may vary based on your work place and position. The fields that may be shown are:
- Date
- Click the date field to select which date you wish to register hous for. When you click the field, a calendar will appear on the page. Find the date and click on it to switch to this date.
- From/to
- Set the time of day you started working. The ending time is calculated automatically based on the activities you register and the break times you enter, and can't be modified.
- Tip: You can use the arrow keys to modify the time. Use the left and right arrow keys to switch between hours and minutes, and the up and down arrow keys to change the selected number.
- Break
- Enter how much time during the day was a break. The value entered here will be added to the ending time, and should not be included on any of the activities below. Breaks should be between hours 10-13. If you didn't take a break, you must give a reason in the comments field.
- Available hours
- Available hours are hours where drivers may register waiting times where the vehicle was stationary. Examples of available hours may be waiting for assignments, ferries etc.
- Passive work
- Hours of particular passive type. Write details in message field.
- Message to payroll department
- If you need to send any message to the payroll department, enter it here. E.g. doctor appointments, dentist, funerals etc.
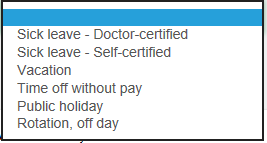
- Absence
- All absence should be registered. Click the dropdown, select the appropriate option and click "Save". Self-certification form and doctor's certificate must be delivered as usual, no later than the first day after the absence.
- When changes have been done in the day form, the buttons "Save" and "Cancel changes" will be activated. "Cancel changes" will restore the values as they were after the previous save.
Save/Cancel changes

The save button is located in the top right toolbar. If this button is deactivated, it means all changes have been saved. Changes are saved automatically when you add/edit/delete activities, and when you click "Submit".
Register activities
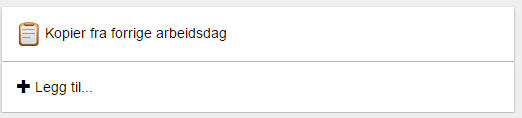
Add activities
Click the line "Add activity..." to open a form for registering a new activity. You may add multiple activities for each day. When you are done filling out the form, press "Save" to save it, or "Cancel" to close the form without saving.
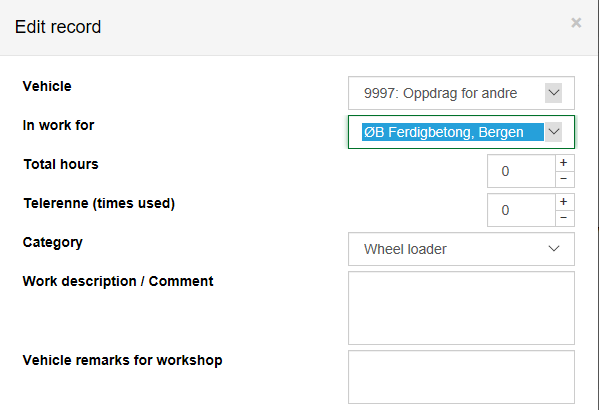
Working for other departments - applies to drivers
All invoiced hours must to assigned to the correct department and category. See the example below. Click the dropdowns to see available options.
Copy from previous workday
Use this option if this days activities are identical to the activities on the previous workday. When clicked, all activities will be copied into this day with the same amount of hours.
This option will only be available if there are no activities currently registered on the selected date.
Edit activity

Click anywhere except on the red X to edit the details for the selected activity. This will open the same form used to register a new activity, but with the values for the selected activity already filled in. Press "Save" to save any changes, or "Cancel" to close the form without saving.
Delete activity
Click the red X-icon to delete an activity. You will be asked to confirm the deletion before it is removed.
Submit for approval
When you have completed the timesheet, it should be submitted for approval. This is done using the "Submit" button (shown as a paper plane on mobile) in the top right toolbar. A dialog with a summary of the timesheet will appear. Verify that this is correct, and press "This is correct" to submit the timesheet. Press "Cancel" to close the dialog and edit the timesheet.
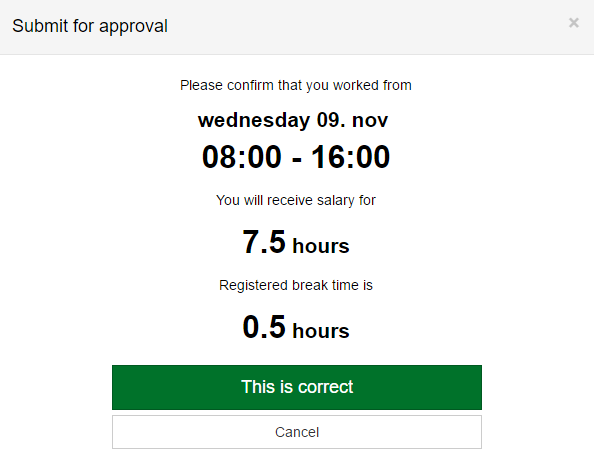
Eksempel på oppsummeringen som kommer når du trykker på "Send"
Statistics
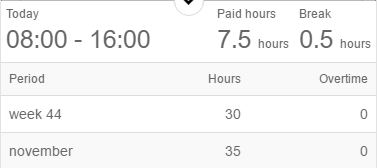
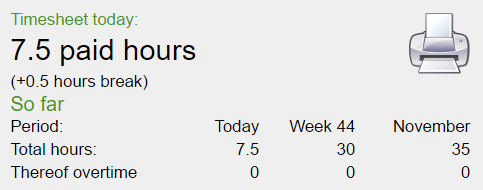
This table will display the statistics for how much you have worked the current day, week and month.
Use the round arrow-button to expand the box and display total number of hours registered this week and month.
Errors/Other problems
If an error occurs, or you have problems registering hours, contact the IT-department (phone number: 4888 9948).